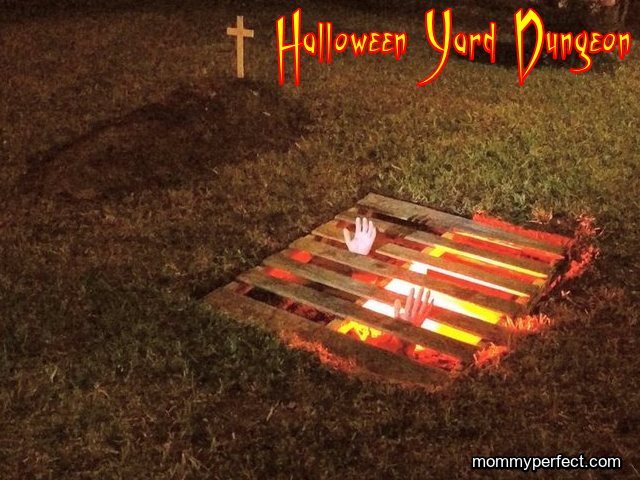
Mommy Perfect shows you how to make a fun Halloween yard dungeon for under $20 in less than an hour.
In the last decade Halloween has become the second most popular American holiday, in terms of participation and money spent, behind Christmas of course. When my grandparents were young it was a minor holiday, rarely celebrated, and only by kids. When I was a youngster in the 80s Halloween had definitely grown in popularity, but still only observed by kids one night a year, and our plastic costumes were bought from the grocery store. Nobody decorated past having a Jack-O-Lantern or hanging up a Halloween craft we made in elementary school. Nowadays Halloween is big business, with seasonal Halloween stores popping up in abandoned K-Marts before school even gets back in, pumpkin spice everything, and more adults are getting into it than ever before. If you’ve seen the price of the elaborate yard decorations being sold these days then you know you need to take a second mortgage on the house just to keep up with the neighbors!
Here’s how to make an inexpensive yet elaborate-looking fun Halloween yard dungeon for under $20 in less than an hour, plus an optional “fresh grave” to add to the frightful delight. Definitely recruit your kids to help.
What you’ll need:
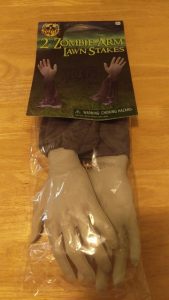
- Zombie Arms — $10. You’ll need to make a trip to the Halloween store to get some “Zombie Arm Lawn Stakes” or something similar. They have a huge selection. Skeleton arms would work, as would “severed” arms and legs, depending how gross and bloody you want to make it. See step F before going to the Halloween store, in case you want to buy an elaborate grave marker.
- Red Light Bulb — $6. Swing by Home Depot or
Lowes for a red light bulb. I got an LED one that uses 8 watts, won’t get hot, and won’t cost much to keep on all month.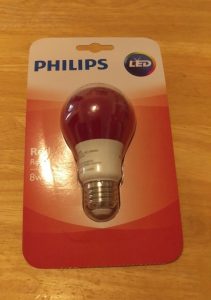
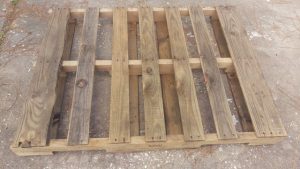
- Basic wooden pallet — free. You can pick one up almost anywhere. I found a stack on the side of the road and took one home. Look on Craigslist or ask around if you don’t have one. (Be careful of splinters.)
- Large glass or plastic jar — free. I used
an empty plastic Claussen pickle jar, but anything similar will work. I soaked in warm soapy water for 30 minutes to peel off the label. Make sure all labels are off so the light can shine through.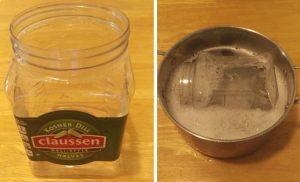
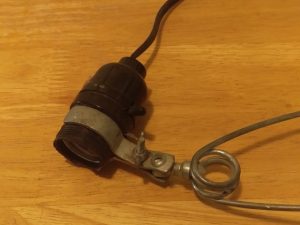
- Old clamp light fixture — free to $10. We had an old reptile clamping light fixture hanging around the garage, but you can buy a new one at Walmart for $10 or less, or check Craigslist and you’ll likely find one cheaper still. Remove the cone if it has one.
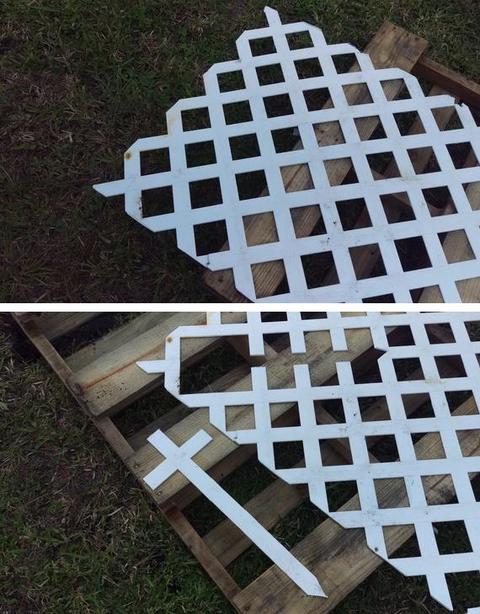
- Grave marker, or plastic lattice — free to $5. I uses some old plastic lattice we had hanging around, but any two pieces of wood you can screw together to make a cross will work. Dollar stores sell basic foam gravestones for real cheap, or get a cool grave marker from the Halloween store if you want to be elaborate.
- (Optional) Old piece of plywood or plastic tarp — free. I used an old piece of 1X10 board about 5 foot long. This is optional, it just makes it easier to clean up in November.
Lets get started:
- Choose a spot for your “dungeon”. Lay the pallet down, and use a shovel to “score” the earth into a square just slightly larger than the pallet.
- Choose a spot for your “fresh grave”. Lay a board (or plastic, or nothing at all) on the spot where you want your pile of dirt to go. A board or plastic tarp will make it easier to shovel the dirt back in November when Halloween is over and you want to fill the hole back in.
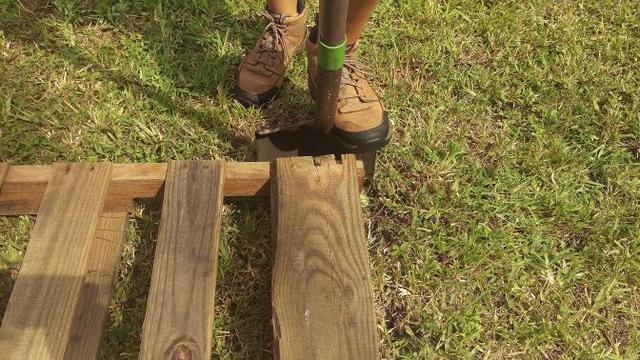
- Dig your square hole about 1′ deep. (Optional) I chose to first move the sod to other more barren parts of my yard, by carefully scoring 2X2 squares and transporting them with the kids’ wagon. Your kids can help lift the grass squares.
- As you dig your for the pallet dungeon, pile the dirt long-ways like a “fresh grave”. When your hole is dug and the pallet fits nicely inside, flush with the top of the ground, dig another deeper spot in the center, about 1 foot deep and 1 foot across. This center hole is for the light fixture to sit in. Let the kids help dig too.
- Put your light bulb, clamping fixture, and large weather protecting jar together, placed down inside the center hole. I used a red brick at the bottom and clamped into that to keep it stable. The jar should keep out light rain and moisture.
- Make a cross. I had some old plastic lattice pieces hanging around and used a simple handsaw to cut out a cross. A jigsaw would work too to cut it to size. Make the bottom of the cross twice as long as it will be under the ground. You can use any two pieces of wood screwed together, or buy a foam gravestone.
- Carefully place the pallet on top. Set your zombie arms in between the pallet slats.
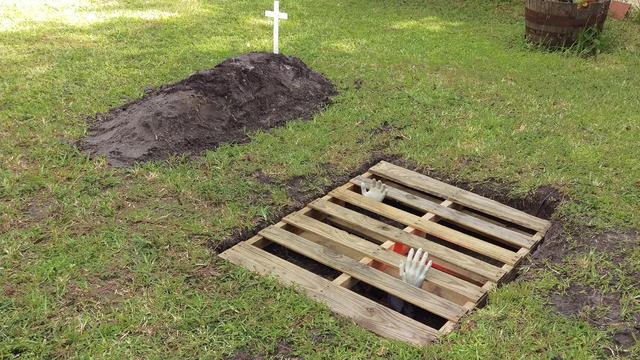
Voila! Easy and cheap, but it looks elaborate and will surely get envious glances from your neighbors. Since the LED light bulb is only 8 watts you can leave it on all month long, day and night, and won’t cost most than $.60 for the whole month. On Halloween night you can place your jack-o-lanterns around the “dungeon” or on the grave for added effect.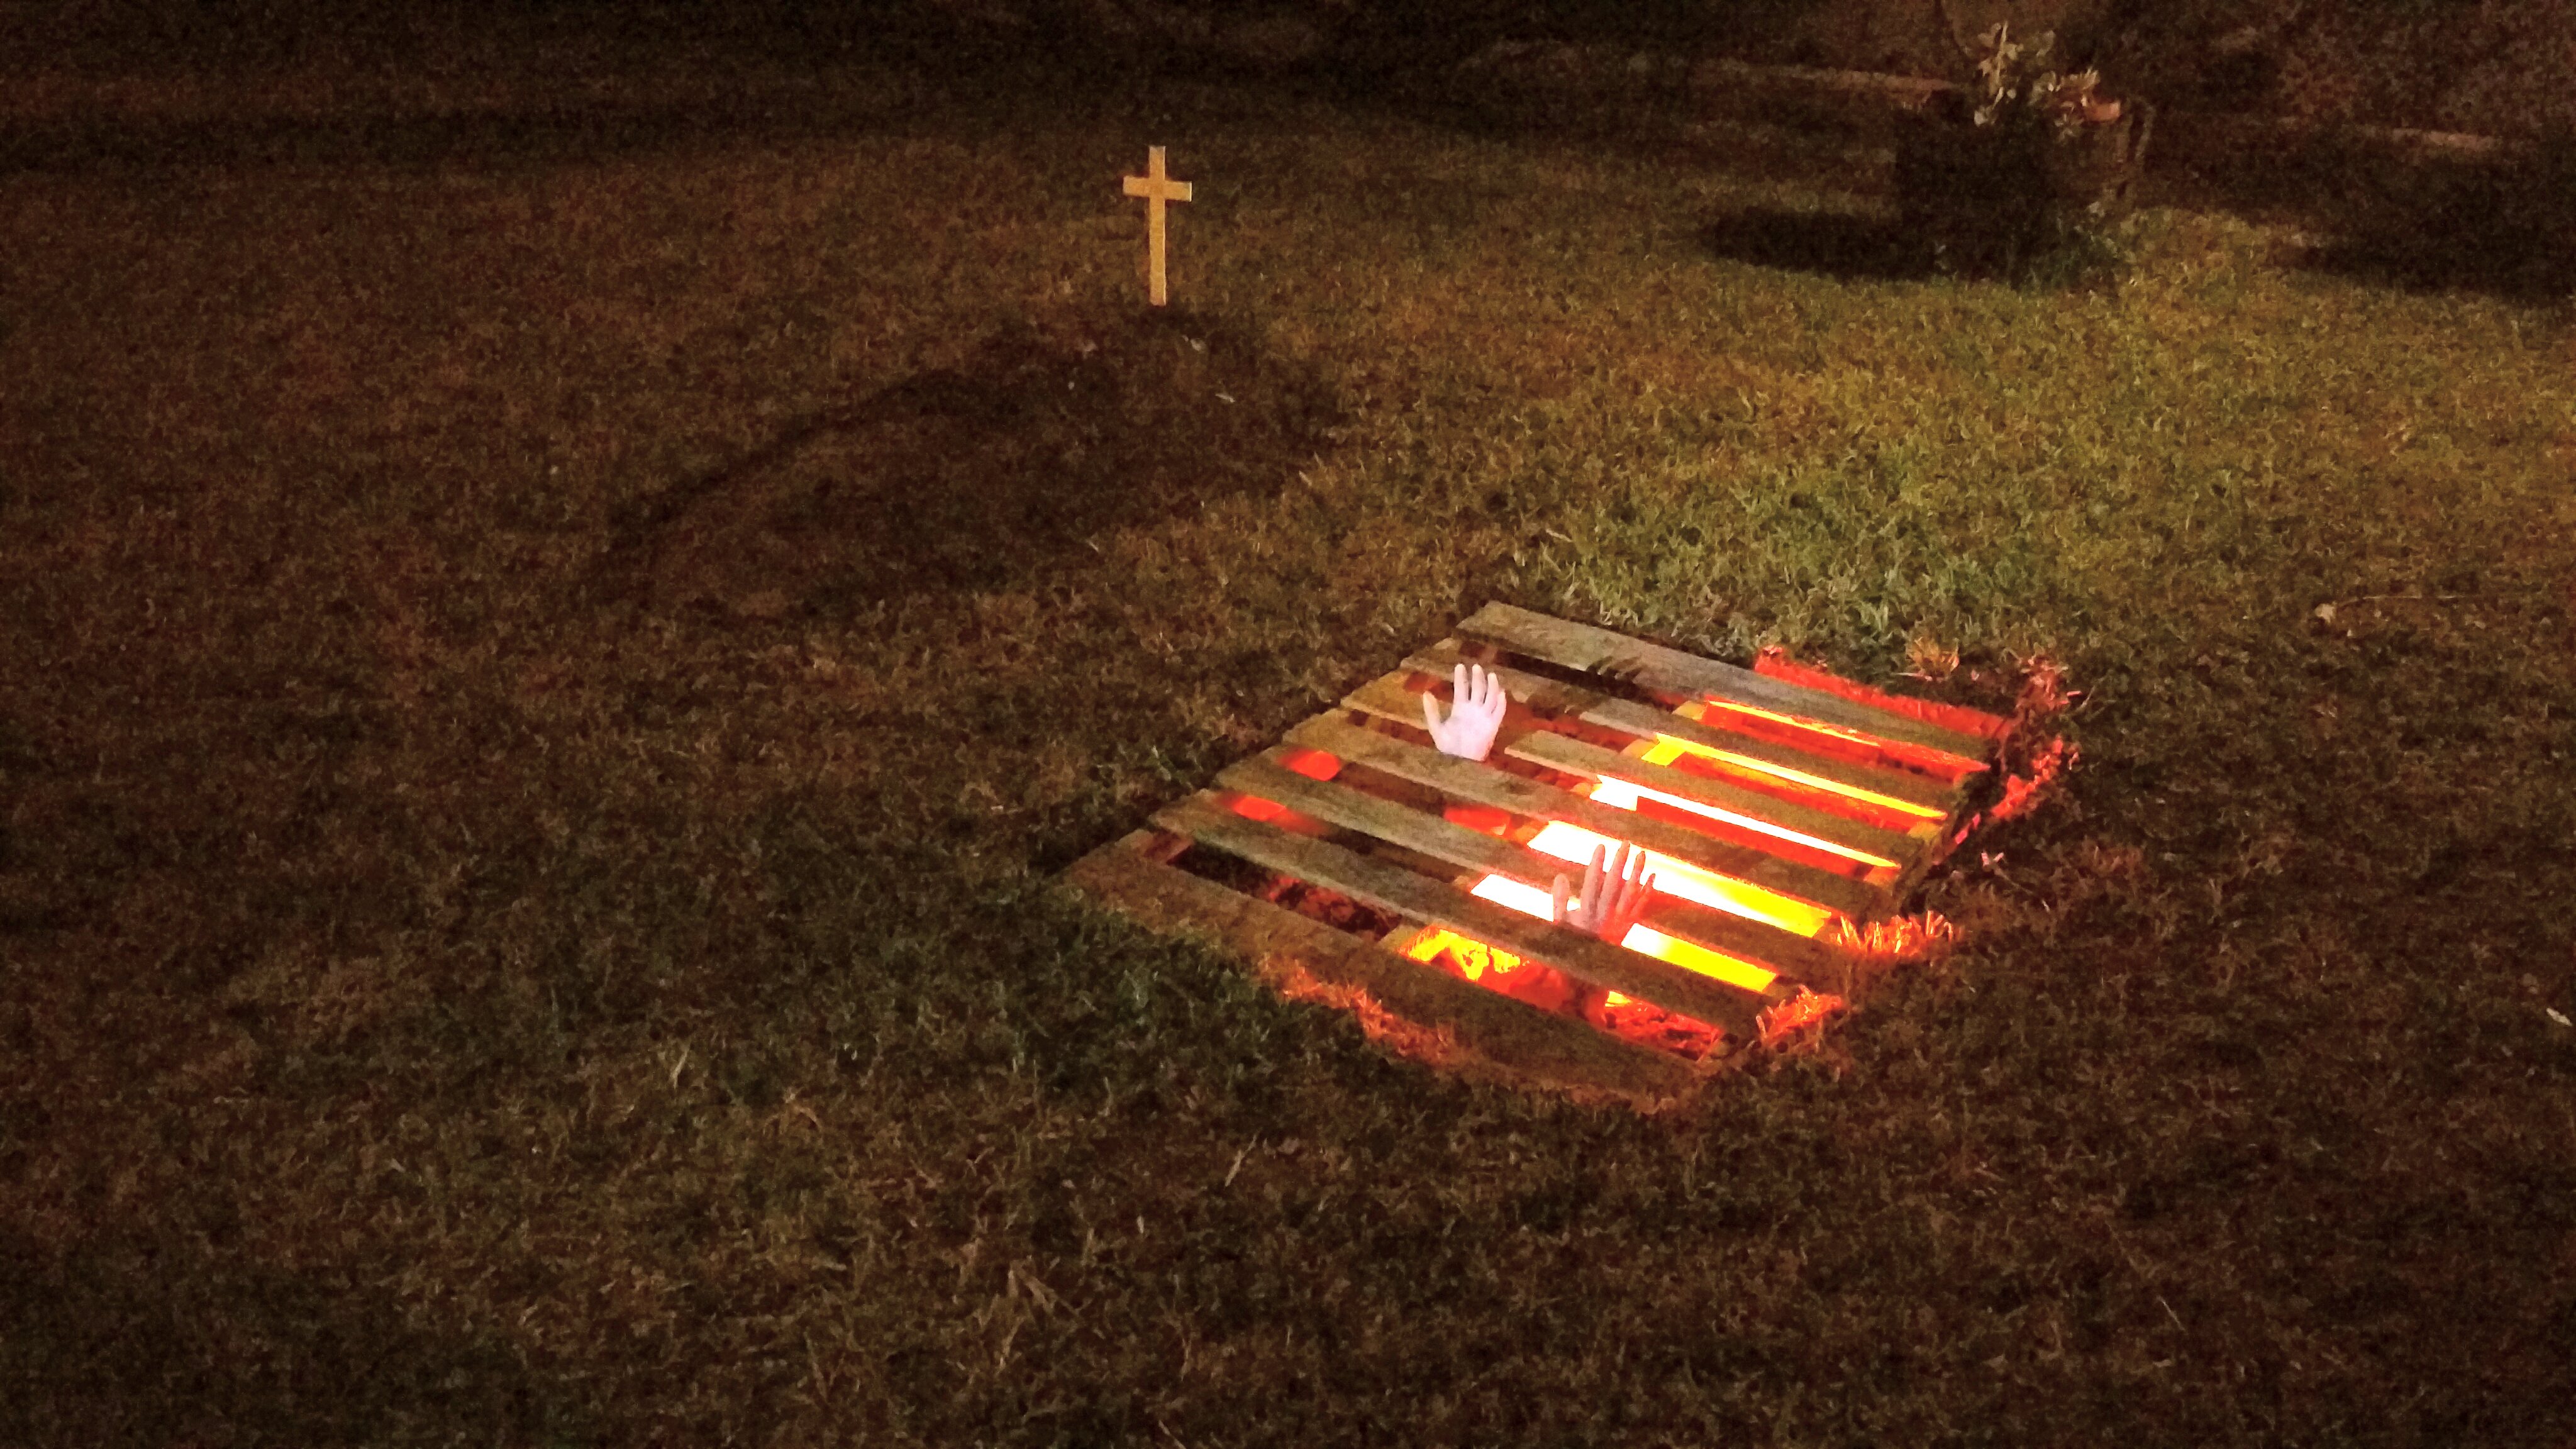
Happy Halloween!
Did you like this craft? Be sure to share on Facebook and Twitter with your friends! Also share photos of your project in the comments section below.